LifeCheck: An Awareness Monitoring Device for Patients Under Conscious Sedation
APPL 465 – Biomedical Instrumentation
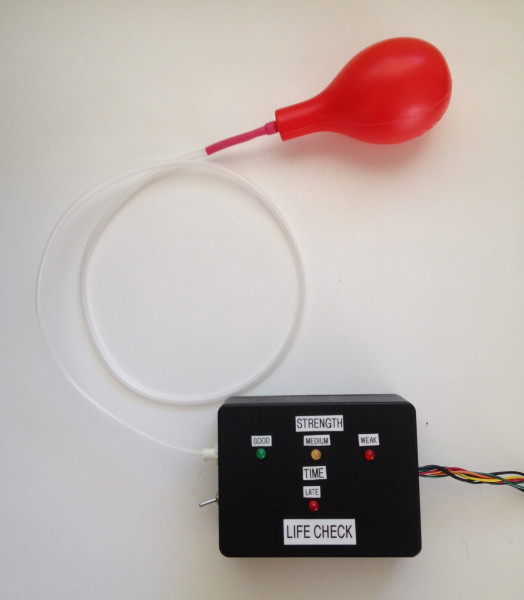 I led a three-student project development team as part of Biomedical Instrumentation in the spring of my junior year (Spring 2014). For this project, we interviewed an anesthesiologist to discover existing needs in the emergency room. From this conversation, we decided to pursue the development of a hand-held pressure sensor. We designed and constructed a compact, battery-powered pressure detection device with LED and buzzer indicators. This device included a removable, hand-held pressure bulb attachment. I also developed a LabVIEW program to allow an operator to interface with the device. This program included calibration and reset settings. The program initiated a beep, analyzed the amount of pressure that the patient applied to bulb, measured the response time, and informed the operator of patient’s awareness level under conscious sedation.
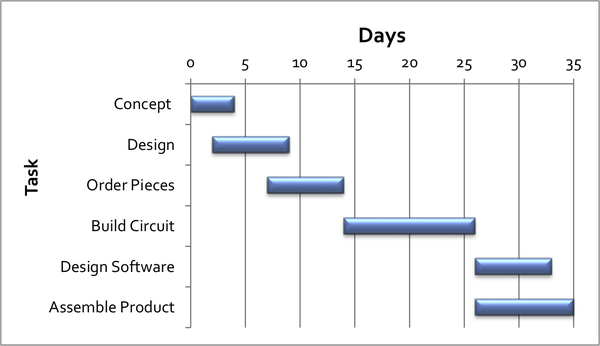
Production Timeline
Start Date: 18 March 2014
End Date: 22 April 2014
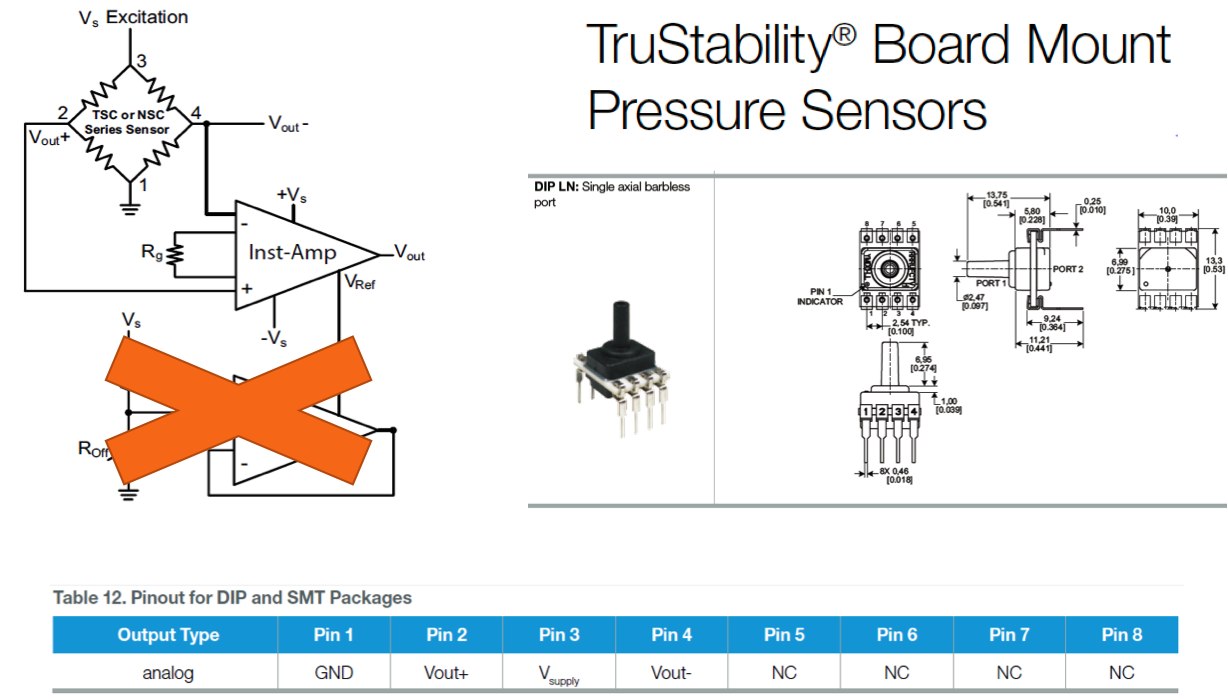
Gage Pressure Sensor Specifications (0-100 psi)
To develop the pressure detection device, we considered a variety of options including load cells, optical sensors, piezoresistive strain gage sensors, and gauge pressure sensors. We ended up using a Honeywell gauge pressure sensor which allowed encompassed the desired pressure range. It also had the flexibility of measuring both air and water pressure. For this application, we were most interested in measuring air pressure.
Testing & Assembly
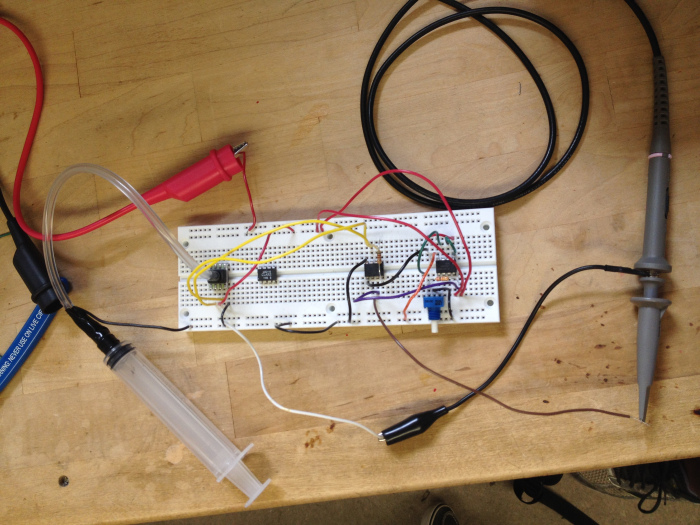
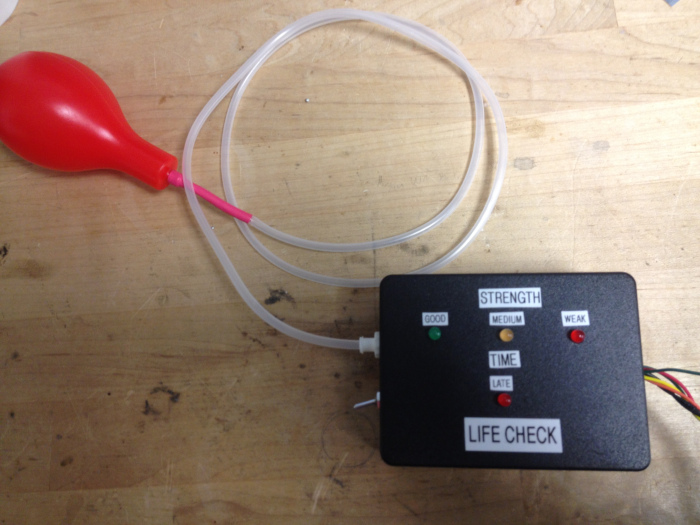
Initially, we tested the system using a syringe to increase and decrease pressure applied to the sensor. Breadboard testing was used to optimize amplification to appropriate levels for NI DAQ 6008 analog input communication. A variety of materials were tested for tubing. Eventually, we determined that the best tubing combination was a thin, flexible piece of tubing inside the device and a longer, more rigid tubing to connect the device to the handheld bulb. We selected the red bulb seen below due to its desirable size and natural feel in the hand. A battery was used to power the LEDs and internal circuitry of the device (excluding the DAQ). All circuitry was soldered in the lab.
 |
 |
| Breadboard Testing | Final Prototype |
LabVIEW Controls
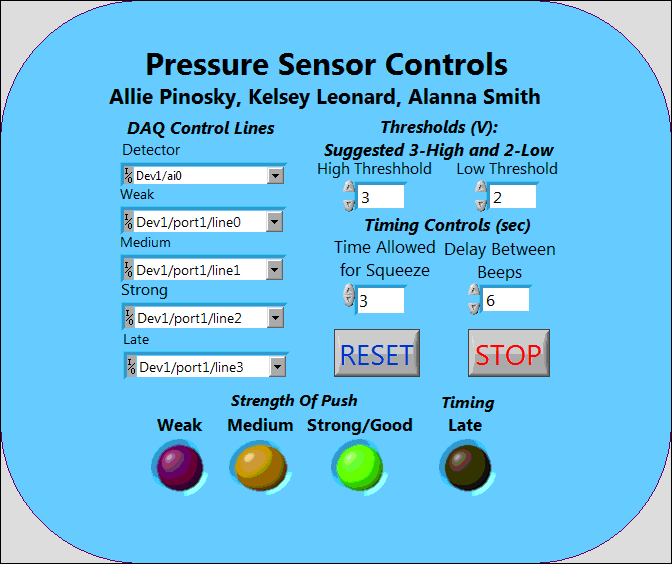
A key part of this system was interfacing the device with the user and the operator. We created a control panel program in LabVEIW. This program allowed the operator to select the high and low thresholds for “pressure.” It also allowed the operator to select the time allowed to squeeze the bulb after the beep as well as the delay desired between beeps. This flexibility allowed the operator to adjust the system for patients of different ages and sizes (children likely press weaker than adults). Once the desired parameters are entered, the program beeps and determines the time taken to respond as well as the strength of the squeeze. The corresponding strength is indicated by LEDs on both the LabVIEW program and hardware. If the user response is too late or too weak, an alarm on the computer goes off. The reset button on the control panel allows the operator to reset the program once the patient has been checked/anesthesia level adjusted if needed.
 |
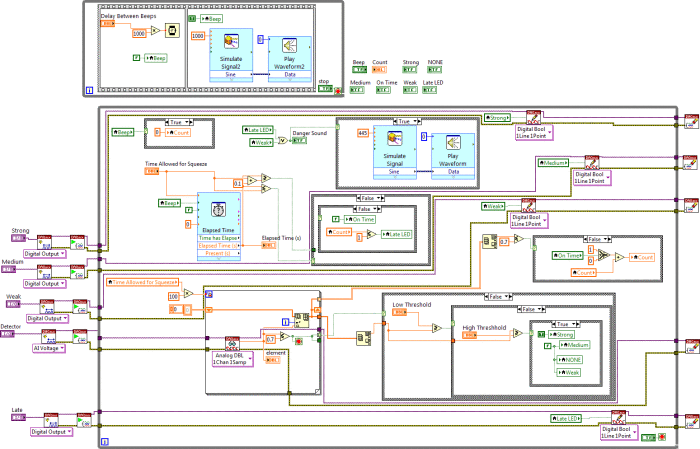 |
| Lifecheck Labview Front Panel | Lifecheck Labview Block Diagram |
Future Improvements
- Design microcontroller interface to eliminate need for DAQ
- Improve aesthetics
- Include buzzer for indicator rather than computer sound
- Create hardwired reset
- Create automated calibration setting
Team members: Allie Pinosky, Alanna Smith, Kelsey Leonard
For more detailed information: Life Check Report
